Showing posts with label Fun with Children. Show all posts

Monday, February 8, 2016

Valentines Marshmallow Pops

My girls and I had some fun making these Valentines Pops recently.   They had seen these for sale in Anthropology for $4.00 a piece.  Inspiration was born; they thought "we can make these easily". And then they inspired me as well. We shopped for  the ingredients we wanted and went to work, and let me tell you they were very quick and simple to make. They made delightful Valentines presents for several of the get-togethers we had, and they also made the cutest  Valentines Bouquet in our dining room. This is something that young and old alike will enjoy making.  You will have to be patient to let the kids have their turn... because other wise you might be tempted to do it all yourself.


Valentines Marshmallow Pops
Ingredients:
Lollipop Sticks (found at craft stores or baking supply stores).
Clear Plastic bags (for wrapping each finished Marshmallow).
Ribbon (to secure plastic bags around lollipop stick).
1 bag Marshmallows: Large and extra large Marshmallows are what we used(in the picture above, Elizabeth is holding the extra large Marshmallows)
1 bag Melting wafers or melting chocolate of choice (we used 1 each of chocolate and pink melting wafers).
Assorted Sprinkles, Shredded Coconut or Nuts

Instructions:
  1. Prepare a work surface, by placing Lollipop sticks and Marshmallows neatly within grasp, various sprinkles in separate bowls, 2 or 3 mugs or cups to place dipped Marshmallows in for drying, and bags and ribbons for wrapping once dry.
  2. Heat melting wafers or chocolate in a double boiler and heat slowly and stir until melted and smooth.
  3. Form an assembly line with melted chocolate, Marshmallows, sticks and sprinkles with in grasp.
  4. Place a popsicle stick into the middle of a Marshmallow and dip halfway into the melted chocolate. Use a knife to help remove excess chocolate.
  5. Use one hand to hold the marshmallow, and the other hand to sprinkle the coconut or sprinkles onto the melted chocolate covered marshmallow.
  6. Set Marshmallow "stick side" down into a mug or glass, and allow to dry completely.
  7. Once dry, cover with plastic and tie a pretty bowl around the plastic to seal.
  8. Display or carry in a cute Valentines bucket.  We had some Florist Foam, that we put into a bucket and covered with confetti type filler.  Then each pop could be stuck into the foam and made to look like a cute bouquet; you could also use this as a way to dry your pops.


Have fun!
post signature

Monday, July 20, 2015

Summer Days and Little Things


We're just about half way through summer.  Life carries on and so do we.  Nothing profound is going on in our part of the world. Cooking, cleaning, laundry, grown daughters, grandchildren, picnics at the river and beach, writing and a few creative projects…. they are all the everyday things that I am up to this summer.

I got my crocheting out again recently.  It has been a few years since I have worked on any kind of crocheting or knitting.  Marie,  Elizabeth and I found a large stash of yarn that I had stored.  We all got inspired and have been crocheting ever since. It has been very satisfying to crochet  in the spare moments.


The grandkids and I are going to paint rocks this week, and I bought a bushel of Georgia Peaches at a roadside stand the other day. I am thinking of making a Cream Peach Pie; these are ordinary uneventful little things  to be sure, but they are the substance of life.  I remember when I was growing up, how the summer seemed to stretch so long.  My best friend Judy and I would mull over what we wanted to do on each day, and would always end up riding our bikes, swimming, playing board games, hopscotch or four square. or walking to the little 7 eleven convenience store a couple of miles away.  Our biggest cares were the few chores that we had to do, and where we got the latest skinned knee.  There is something so sweet about those days, that were simple, and uneventful.  Some of the little mundane  have more value in them than we sometimes realize.

I don't think we should underestimate the value of the  ordinary and little things. Living a peaceful and quiet life in itself is a testimony.  A smile someone gives you when you are struggling with something painful in your life may seem small, to them, but it is really BIG to you. I know this first hand.  A little word of encouragement may go unnoticed by others; but to you it is huge and it does not go unnoticed by God. He sees the faithfulness in all of the little things that you do: getting up each day and providing for your family, the kindness you show to others, the help you offer, the noticing of someone that no one else notices, the eye contact you make with a smile or a nod or a kind word, the honor you give others, the words you speak, the sweet memories you create with your family, the work you do with diligence, the prayers you pray for loved ones and strangers alike, the forgiveness you extend, the love that flows from you, expressed in a touch or an action; cooking a meal or writing a note or making a little gift or even the giving of a cup of cold water, It is valuable, its like glue that holds our life together.


I hope you are all doing well.  Perhaps your days are filled with ordinary little things, but don't underestimate the value of those things, or be impatient that nothing seems to be happening.  So much goes on in the unseen world that we don't see at this moment.


Have a great week Everyone.

And whoever in the name of a disciple gives to one of these little ones even a cup of cold water to drink, truly I say to you, he shall not lose his reward.” Matt. 10:42


Sunday, May 3, 2015

Paper Flowers on Canvas

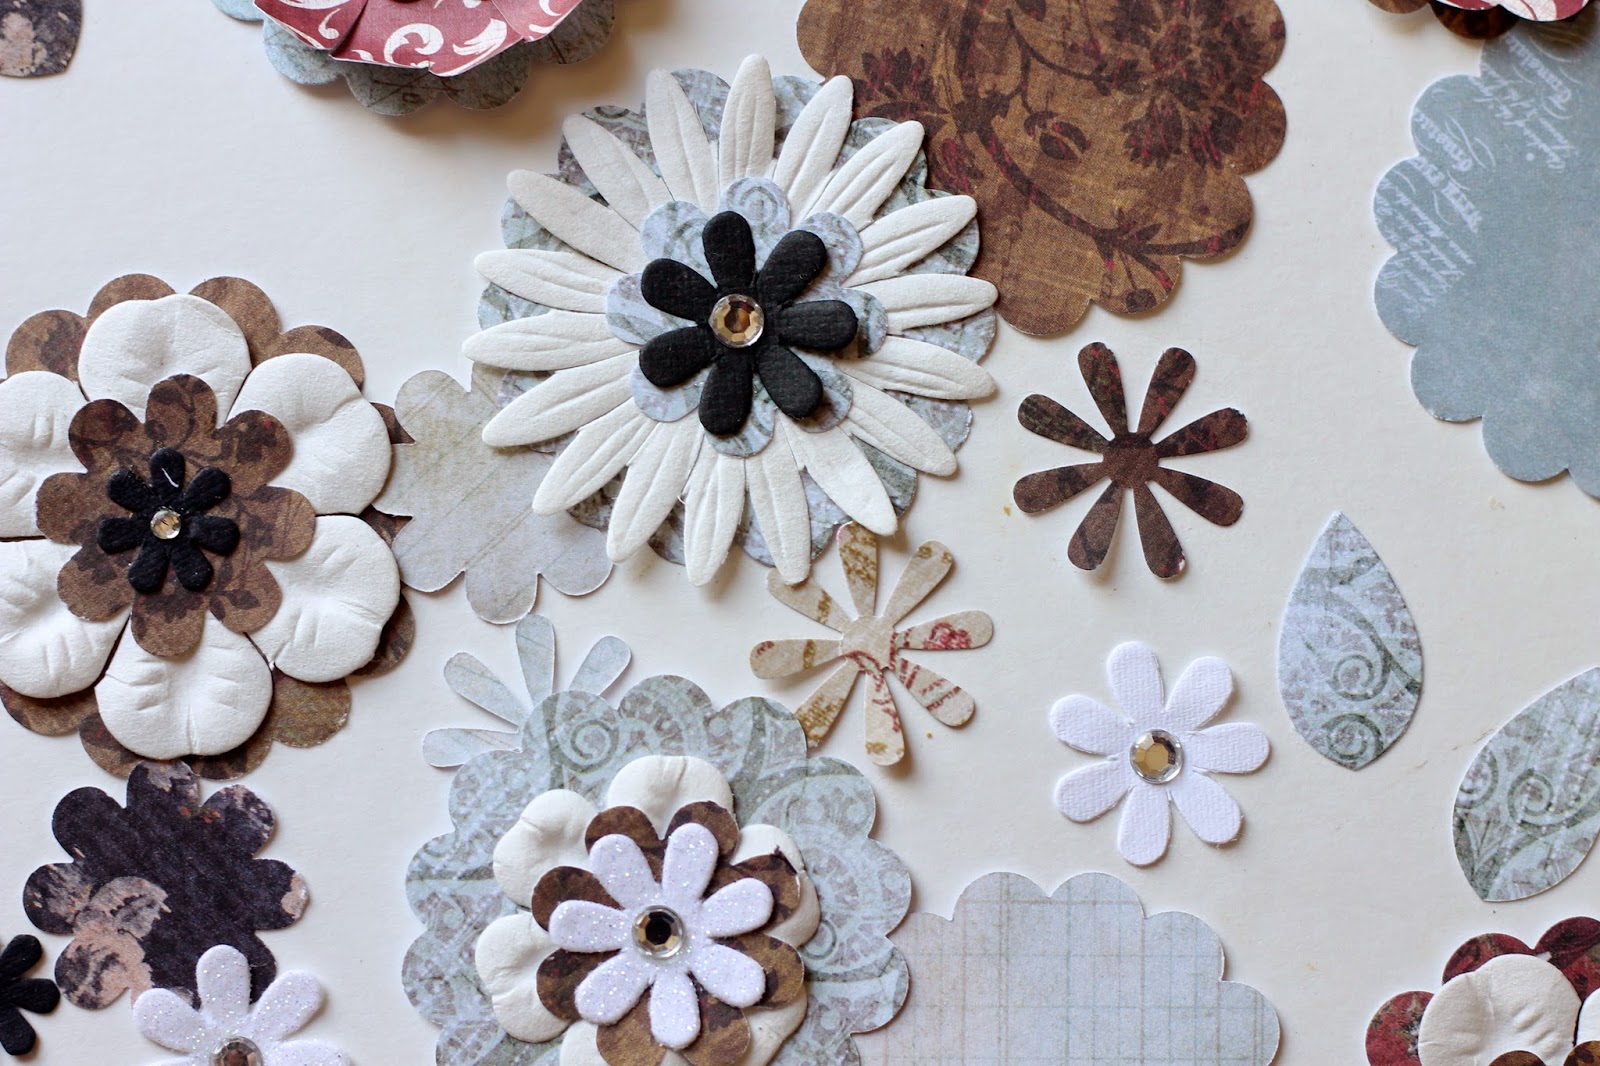
I think I must have a "thing" for paper projects; I seem to have made quite a few. I can't resist pretty scrapbook paper, so I suppose I am always drawn to just a little more, and am always mulling over something to make with it. You can make these pretty little flowers in no time, and use them to decorate walls, windows, packages, scrapbook pages, envelopes, cards, picture frames, and more.  Last week, I used them to help my grandsons make some Mother's Day presents for their Mama's.  We had so much fun creating pictures on a canvas.


Here they are strung out on a line with clothespins, or you can also sew them together like I did with these and these.  To make a canvas picture you will need the following:


You can buy pre made flowers like the ones on the left, or you can purchase a punch with the flower shapes you want, as seen top left and top right: I combined both.

Supplies:
1.  Pre-made paper flowers or
2.  Paper flower punches
3.  Scrapbook paper
4.  Glue or brads for holding flowers together
5.  Mod Podge
6.  A canvas as shown below
7.  Spray Paint to spray the canvas with.


Instructions as Follows:

1. Prepare a Canvas for your picture:


 I had painted the canvases black before the boys came over, so they were ready to go when they got here.  Black is a good color to make the picture elements pop forward.


2. Cut out flower shapes
If you purchase a flower punch,  you are always ready for a project anytime of the year. 

I got these flower punches at Hobby during one of their half off sales.


The boys had a good time punching out flower shapes.


Each of them loved taking their turn.


3. Layer and glue or attach each petal group together.
You can glue your flowers together, or layer them, pierce a hole in the center, and put a brad through the hole to make a cute center detail and hold them together without glue…. there is an example of the brad in the bottom picture on the left.


4. Glue Flowers and leaves to the canvas.
When your flowers and leaves are ready, draw a line on the canvas with paint or crayon or chalk that will represent the stem of the flower.  Next glue the flowers and leaves to the stem.


They wanted to add a little grass on the bottom as well.


We started out using chalk, for the stems and grass, but ended up using a little acrylic paint once the Mod Podge was dry, because the chalk disappeared under the Mod Podge.  You could start with paint or crayons, and allow to dry before glueing on flowers and leaves.


5. Paint over the top with a coat of Mod Podge.


6.  Allow to dry.
Allow to dry 30 minutes to an hour or maybe more, depending on how thick you paint the Mod Podge on. In these pictures, the Mod Podge  is still drying, because it went on really thick.


When these were good and dry, I helped the boys wrap them for Mother's Day for their Mamas.  They  had a great time, and were very proud to walk out the door with a present ready for Mother's Day.

Here is how it looked once the Mod Podge was completely dry.

Have fun.

Happy Mother's Day to all the Mom's out there.  


Wednesday, July 3, 2013

Star Spangled Banner


Today I am getting ready for the  Fourth of July Celebration.  I am going to be doing some cooking and baking.  Tomorrow we are going to the "Wet Parade" out in Pueblo West like we have in years past, and are going to our friends the Jone's house afterwards for some food and fun.  We are all going to pitch in and cook.  

Meanwhile back at the ranch...   I was wanting to make a few easy decorations this year ; I had a few simple things that I do every year,  but had an itch to do something crafty, fun and easy. I ended up making this little banner.  I thought I would share it with you.  If you need a simple Fourth of July craft you can make with the kids... this is one you can add to your list.  The kids will have fun helping you cut these out.  I like to put on an old movie and watch it while I do stuff like this.


On the back side of your paper, draw star  shapes with cookie  cutters as a stencil.  I dug through my cookie cutter collection and came up with four different cookie cutters.  I used all four to make a variety of sizes.


Cut  your shapes out in  different "Fourth of July type paper"... even brown paper bags will work nicely in a pinch.


I happened to have an extra piece of burlap, so I cut some burlap stars too.


Cut the burlap stars using the paper stars as a pattern.  I cut them roughly and slightly bigger than the paper stars.


Sew them together.


Sew a little bit of looped ribbon to each end (you can barley see mine on the top right corner).  That works well for hanging it in a variety of places.   In the picture above I didn't have it looped over a hook or a nail, because I didn't have the space to let it hang the way I want to leave it. I just had it on this wall to get a picture (it is my only blank wall in the house.... I am going to hang this outside; but at the moment it is too windy to get a decent picture... this is the best inside wall picture I can manage..and its not a very big wall).


Sew the stars together in a variety of ways, some with paper and burlap combined, some with only burlap and no paper stars, and you can even layer some of the shapes and sizes... which I did, but can't show you, because I took these pictures in too much of a hurry and didn't remember to get a picture of each type... sorry.... now if I done this a week ago.... I would have had plenty of time to get it just right for you; but what can I say... the fourth of July is tomorrow.  I have to get to cooking.


I will hang them out in our patio after we get everything spiffed up out there today.


They twist and turn and dangle nicely.


Have fun, and have a great Fourth of July.